
My Technology Learning Curve
For many years, I avoided learning anything about the behind the scenes of how computers work. I’m not afraid of technical, in fact I rather enjoy the combination analysis and creativity that computer work represents. It’s just that it was Chris’ bailiwick. He wrote his first computer program in the ‘70s, when he was in middle school, and he came up in an era when computer people built their own computers and then programmed them. He knew everything we needed to know about computers, so computer stuff was something I could delegate. Lord knows, I had enough other stuff to do; it was good not to think about that one thing.
When I first started blogging, I started with a self-hosted WordPress site. Chris helped me register a domain, then I found a theme and started writing posts. For many years, that’s how I ran my blog. I did not go into CPanel on my host, except to set up email accounts. I did not attempt to adjust anything other than settings in the theme. I had few plugins because I didn’t understand why I needed them. And, most importantly for today’s story, I uploaded full-size pictures directly from my phone because I didn’t know any better.
Two years ago, I agreed to be the Technology Chair for the Florida Tropical Weavers Guild (FTWG). This was a newly created position with two primary responsibilities — revamp and maintain the website and implement online registration for the annual conference. My first stab at revamping the website was to move it to WordPress and throw a theme at it.
It quickly became apparent that I would need to learn more if I was going to do everything I needed to do with the FTWG website. But what exactly did I need to learn? I spent a couple of months figuring that out. I read books and websites. I attended WordPress meetups, WordCamp, and a blogging conference. I watched webinars, classes, and sessions from other WordCamps.
Along the way, I learned a lot about WordPress and blogging. I installed and configured plugins. I became more comfortable in CPanel and started looking at PHP files, SQL databases, and File Manager. I still don’t manipulate any of these files. I haven’t learned to write PHP, SQL, Javascript, CSS, or HTML. But I do know what the function of each language is and will at least peek at them to see how they are working when I run into problems. I can use the information I gather to frame questions.
I’ve been down this rabbit hole of learning for just shy of a year now and I have become more comfortable with poking around in the guts of a website. But there is one tool I continued to avoid — Terminal.
What is Terminal?
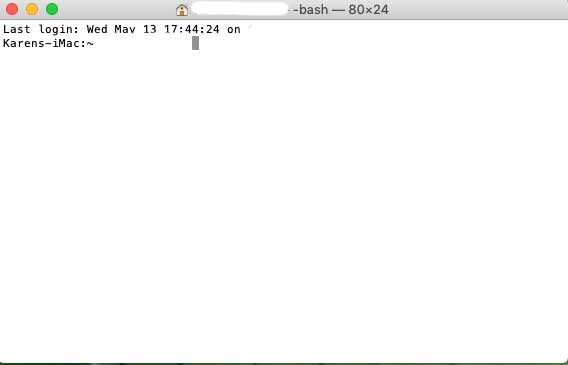
Terminal is a Mac app that lets you communicate directly to your computer. (If you’re on a Windows computer, the equivalent is Command Line or cmd.exe). When you open the app, it looks like something out of 1986 — it is a mostly blank screen with a blinking cursor. There are no buttons or hints. You have to type commands in a coded fashion, not actual English. And you can really screw up your computer if you do something wrong.
Once in a while, I ask Chris for help and he says, “Oh, that’s a simple thing to figure out in Terminal.” Then he sits at my computer, types some gobbledegook, and answers my question. Recently, he’s been insisting that I sit down and do the typing while he tells me what to type and why. Yesterday was one of those days.
My Problem
I knew that yarnycurtain.com was taking up an inordinate amount of space — 9 GB! Daily backups were eating up storage space. The site was slow to load. We are looking at moving to a different host, which limits total space. I needed to figure out what was causing the site to be so big.
I assumed the problem was pictures. With over 200 posts on that site, I have many hundreds of pictures, all uploaded at full size. I decided that I was going to edit all the pictures and reupload them, a project that was going to take hours and hours. Before embarking on such a big project, I wanted to confirm that the problem really was the photos. I’d hate to do all the work, only to find that it did not solve the problem.
I signed into CPanel and started poking around in the guts of the site. I figured out where the images are stored. It turns out that the Media files are stored in a way that makes it impossible to see the size of all the images at once in File Manager. The file structure for Media Files is Uploads -> Year -> Month. I’ve been blogging on Yarnycurtain since 2013, so I would have to look through more than 40 different folders to find any large files.
Terminal to the Rescue
I asked Chris if he knew a way to quickly review files in order to find large files, and of course he said Terminal — which is available in CPanel. He didn’t know the command, so we had to look that up. Here’s the final command we used:
du -ach ./domainname |sort
du = disk usage. This will give a list of the size of your directories.
-ach are modifiers of the basic du command. Each letter modifies the basic command in a different way. Case matters for commands in Terminal, so if you use this command line, do type the -ach in lowercase letters.
a = display a line for each individual file, not just folders
c = display the total usage
h = display the results in a human readable format
./domainname is only necessary if you have multiple domain names on the same hosting account and the domain you want to list is not the primary domain on the site. If you only have one domain, you can omit this portion of the command.
|sort = the results are sorted from smallest file to largest file. (Note: the character before the word ‘sort’ is a vertical line, called a pipe. On a standard keyboard, it is above the \).
When we ran this command for Yarnycurtain, we learned that I have seven files on the site, each of which are nearly a gigabyte, causing the majority of my problems. Six of the files are images. The seventh is a plugin. Rather than spending hours modifying every single picture on the site, I can modify six pictures and delete the plugin (which was providing a convenience rather than an essential function). Voila! Less than an hour to get the site from 9 GB to 2 GB.
I wouldn’t say I’m in love with Terminal now — it still makes me nervous — but I might have a little crush on it.